 Flowpin
Process mapping workshop: a five-step guide
Process mapping works when the group sees its process while talking about it. This guide shows a proven flow for the session, and how Flowpin helps.
1. Prepare
Agree beforehand where the process starts and ends ("need arises" to "goods ordered"), who is involved and what the outcome should be: a current-state process, a target process or a list of problems. Create a workshop in Flowpin and enter client, date and participants; this becomes the header of the minutes.
2. Write down what is said
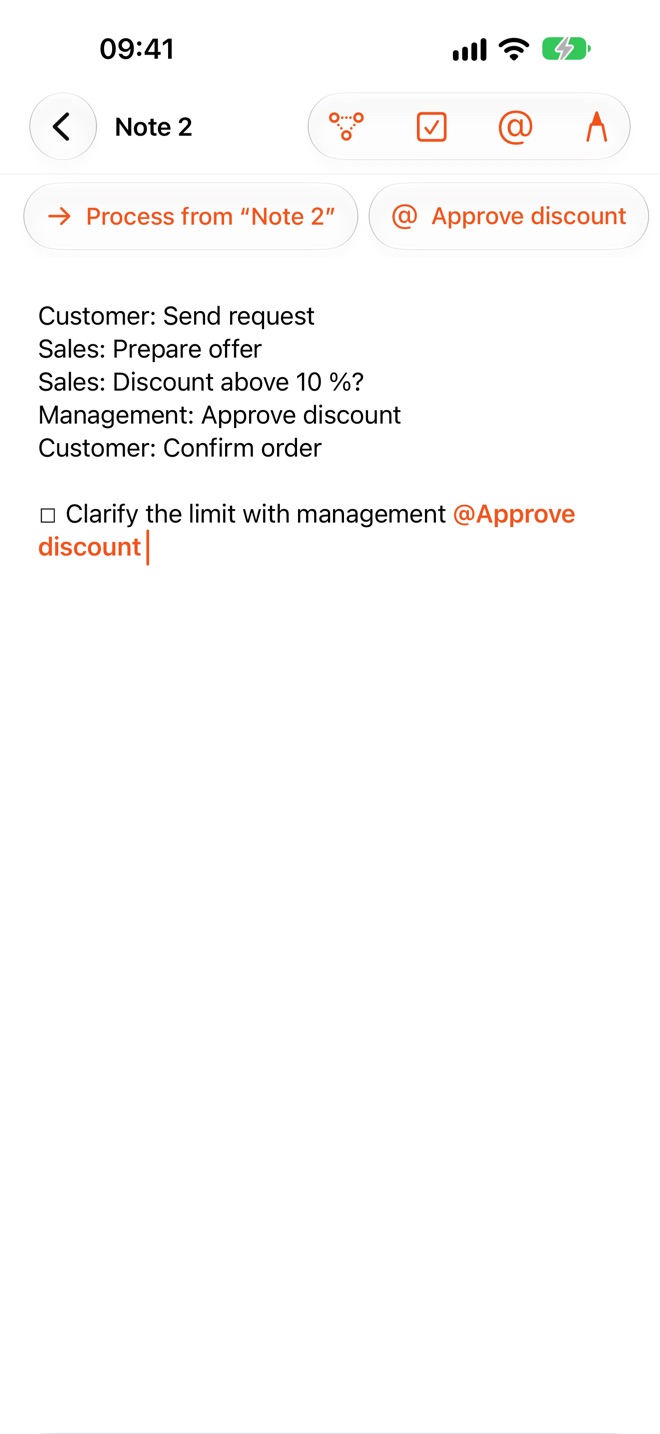
Let participants talk and write line by line, one line per step. Who does it goes first: "Purchasing: Check offer". Write decisions as questions: "Above €5,000?". Photos of flipcharts and whiteboards go on a photo page.
3. Model live
"Model" turns the note into a BPMN process: each line becomes a step, "Name:" at the start becomes a lane, a question a decision with "yes" and "no". Show the result right away, ideally on the big screen (how to present from iPad to Mac). Append missing steps with a tap; lines added to the note later can be merged into the process at the right place.
4. Close the gaps
Good questions for the group: What triggers the process? Who decides here? What happens on "no"? Where do we wait? Turn open points into tasks, on the shape or in the note. Orange hints show where the flow isn't finished yet.
5. Send the result
The minutes PDF contains details, participants, tasks, notes, photos and every process with its list of steps (more on minutes). Hand the process itself to your modeling tool as a .bpmn file.
Flowpin is free for iPhone, iPad and Mac, with no account and no server.
Download on the App StoreAll guides